gelato alla fragola
stawberry ice cream
I’m thrilled to say that this is the first summer (after many attempts) that I have been successfully able to grow my very own strawberries! Unfortunately not enough to make strawberry ice cream, but, alas, sufficient to savour the sweet marvel that is freshly grown & picked strawberries! The flavour surpasses all other strawberries I have ever really bought; whether from fruit vendors or growers markets. Perhaps it’s the absence of time; the ability to pick direct from my own plant at a minutes notice?! Our 6 year old, Remy, would agree wholeheartedly! He is the first to scurry upon my trug of garden harvest in search of plump juicy ripe red strawberries. There have been days where production has been low; one tiny strawberry rationed out between 3 of us! My tastebud screeched, “that’s a tease, but I’ll take it nonetheless!”.
Now let’s be clear on one thing. Gelato is the word for ice cream in Italian, however, there are many differences dividing gelato from ice cream. Gelato is lower in fat because it contains less cream and more milk, and is churned slower resulting in less air and a richer flavour. There are other variances to include (I recall reading that gelato is frozen at different temperatures to ice cream), therefore, for the purposes of this post, I have made strawberry ice cream and not strawberry gelato. I have used an equal amount of milk to cream (1:1 ratio) and have churned as per my ice cream churning machine instructions, which whilst is slow, would not equate to gelato slow churring machines.
As mentioned earlier, I have rarely bought strawberries as tasty as our own home grown quality. However, few weeks ago, I happened upon punnets of strawberries (from a reliable local fruit vendor) with the same distinct brilliant red colour and sweet aroma as those I’ve come to know from my own garden. The price was very very reasonable, which is often the case of produce in seasonally abundance, and thus, I bought 6 punnets! I had strawberry ice cream in mind! I mention our Remy here again, as Strawberry Ice Cream is his favourite flavour. He was feverish when he learnt of my plan for those strawberry punnets! Consequently, it is now everyone’s favourite flavoured ice cream – well at least for the time being while strawberries are in their seasonal element and that’s the only ice cream I’m making! Ha!
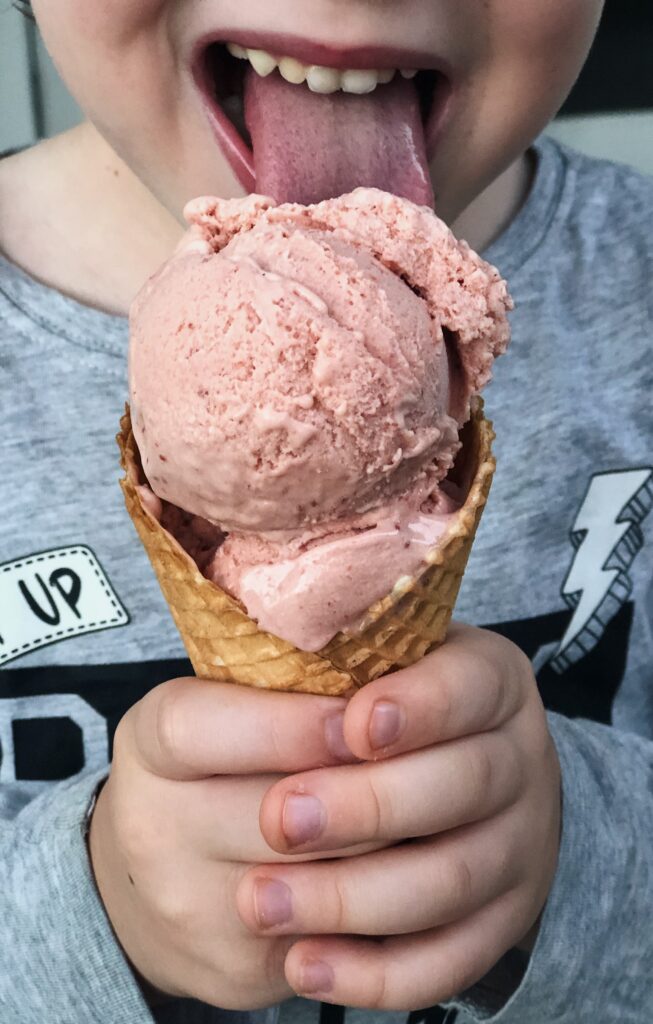
Seasonal summer Strawberry Ice Cream is everyone’s favourite.
I commence this recipe 1 to 2 days ahead. I dedicate time to gently roasting rinsed, stem removed & halved strawberries with brown sugar and the zest & juice of half a large lemon. Adding sugar, vanilla, or an acid such as citrus juice or vinegar enhances the flavour of the strawberry. Once out of the oven, I allow it to sit, cool and macerate – sometimes over-night in the fridge for an intense sweet strawberry flavour, but this is not necessary.
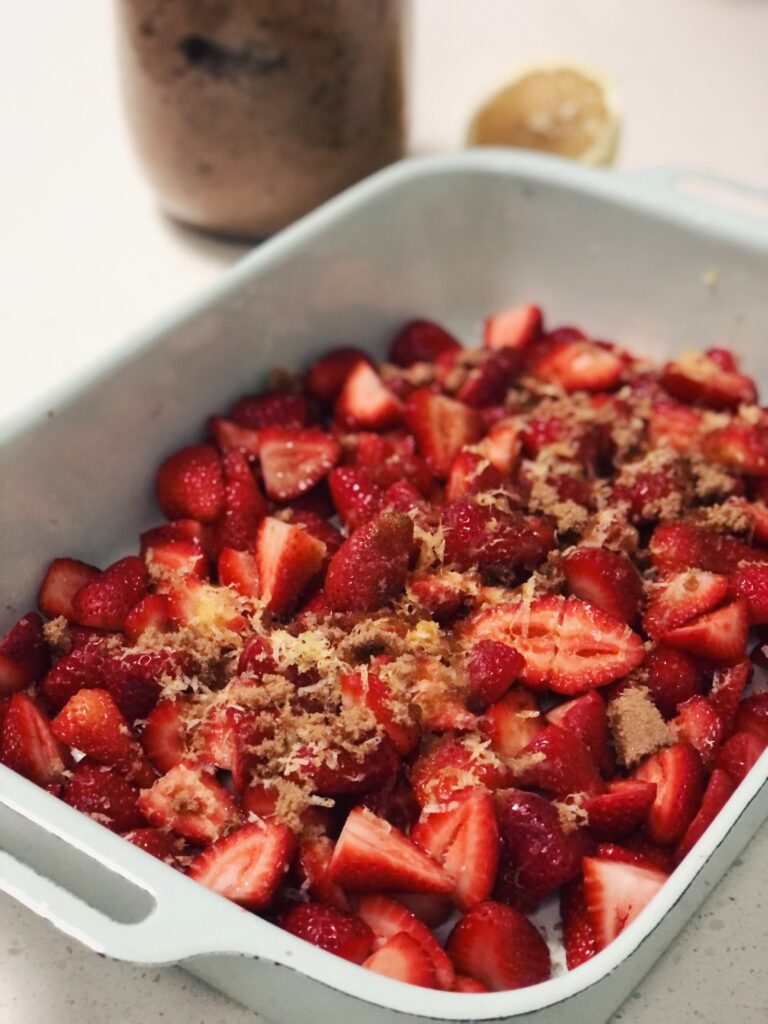
Strawberries – rinsed, stem removed, halved. Brown sugar and lemon zest and juice added.
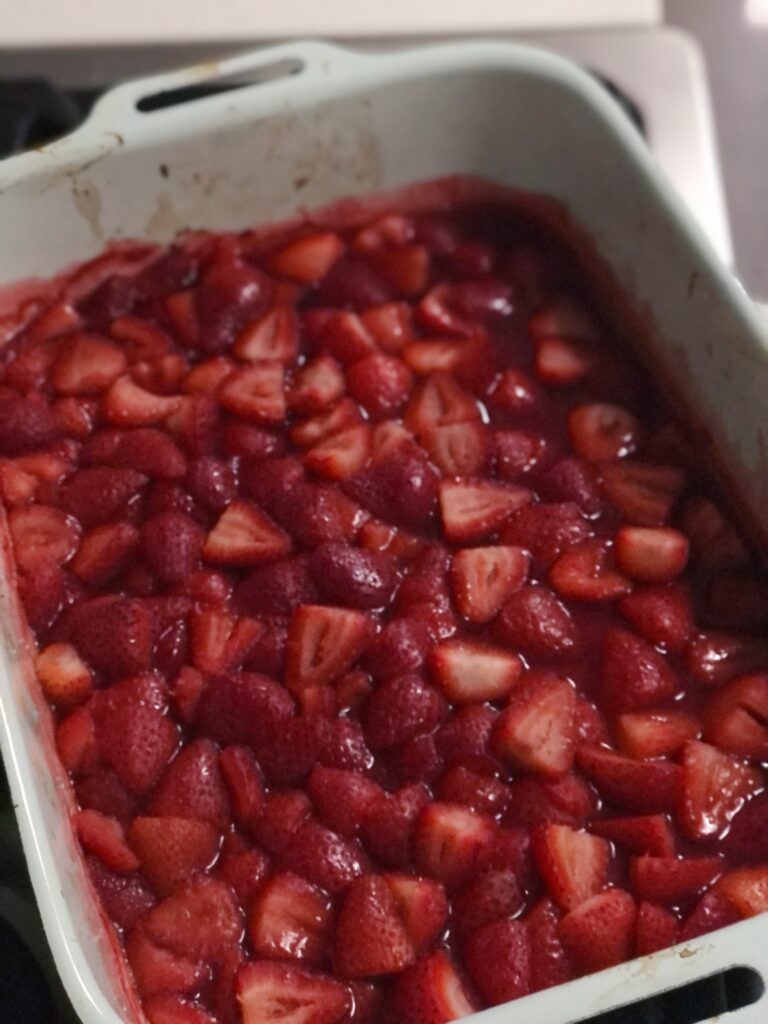
Roasted strawberries with brown sugar and the zest and juice of half a lemon
Once it is cooled, I puree this magical concoction and add it to a base I use in all my ice creams – crème anglaise.
Crème anglaise is a French term known as a light pouring custard used universally to make ice cream and, additionally, to be served as a dessert cream or sauce. It’s a made with a mix of egg yolks, sugar, milk and cream. The custard thickness can vary depending on ratio of cream to milk (more cream than milk), and too, the type of cream used – example thickened cream verses pouring cream. It is worth mentioning here, the amount of yolks used can further aid thickness as well as richness!!!
The crème anglaise recipe I share with you today, I learnt while working as a pastry chef at Cafè Sopra at Fratelli Fresh in Waterloo many moons ago! I use to make 3 litres of vanilla crème anglaise (every few days) which involved cracking 36 eggs for their yolks! Yes, you read correctly – 36 egg yolks were needed! I would then add whatever additional flavour was required and pour this into a churning machine.
You can absolutely use the crème anglaise recipe I share below as the base for all your ice cream recipes – just change the flavour according to your preference and what’s in season. Roast a few plums with spices from now till the start of autumn. Allow them to cool, then puree, and add to your crème anglaise which you will churn and then freeze till ready. Or infuse roasted fennel in your crème anglaise for an aniseed flavoured ice cream in autumn/winter/spring! You are really limitless in what flavours you can create!
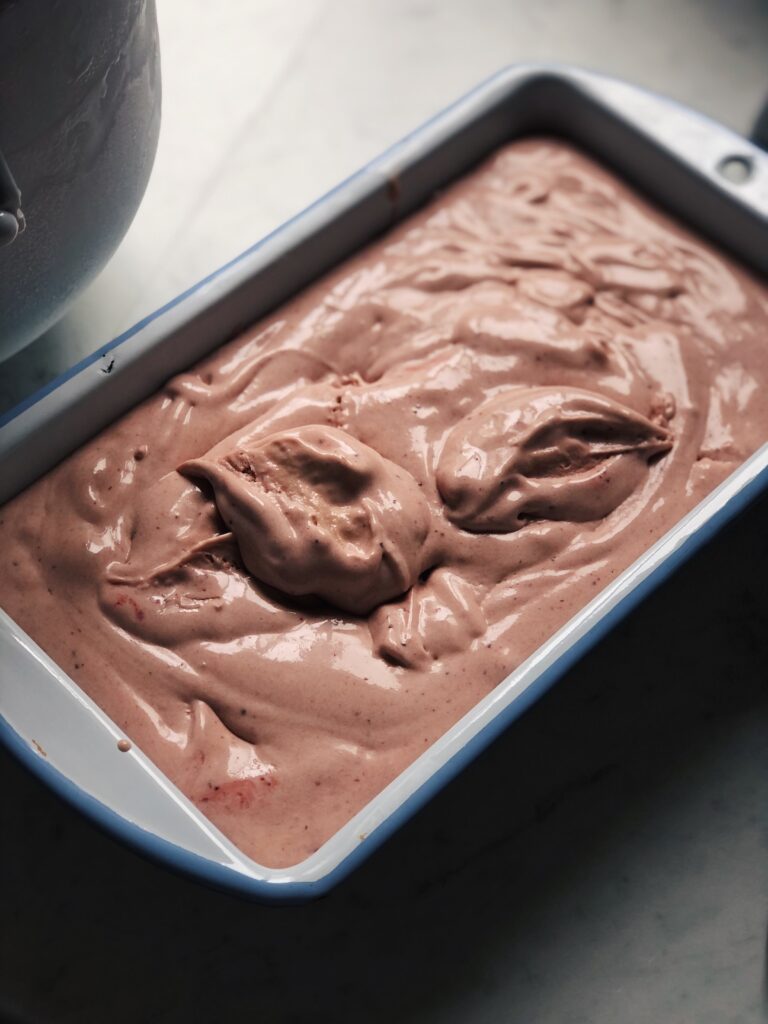
Churned Strawberry Ice Cream ready for the freezer
Now on the subject of ice cream churners – I have an Ice Cream churner/maker attachment for my KitchenAid. I have been asked many times whether I would recommend purchasing an KitchenAid Ice Cream Churning Attachment or another brand of ice cream churning machine. I would recommend it, especially if you plan to make lots of ice cream as I do! I make lots of ice cream throughout summer, autumn and spring; even in winter at times! I often scoop homemade ice cream to accompany crostate (tarts) for dessert in my cooking classes at The Village Cooks. Evidently, I value my ice cream churner. However, you can make ice cream without this churning machine. You can churn it yourself! It will just require a hand-held tool and some time.
Here is how to make ice cream without an ice cream churner/maker: pour the flavoured custard (crème anglaise) into a container and place in the freezer for 1 hour. Take it out and mix it up really well with a whisk or hand-held blender or even a spatula. Keep repeating this process every hour or until the mixture is mostly frozen and then let if freeze completely. Continually stirring the ice cream every hour basically mimics what an ice cream maker would do in 20 minutes or so, and this is the most important step to ensure the ice cream is creamy.
[mpprecipe-recipe:106]